Showing posts with label Registry Script. Show all posts

Remove Write Protection from USB

Hi friends .. I think all of us have gone through the Error "The disk is Write Protected". But only some of us have really got the chance to overcome this error without format his or her system. Itsis because sometimes when this error occurs due to virus attack, we assumes that format is the only option to overcome with this. Today we will show you the way to Remove Write Protection from the USB drive. One thing I need to say before discussing is that most of the time this Error occurs from the Operating System, not due to the USB device.  So to Remove Write Protection from the USB we need to change some Registry Values.

First have a look of the error you can get due to Write Protection on the Disk:
  • Cannot copy files and folders, disk is write Protected.
  • Cannot format the drive, Drive is write protected.
  • The Disk is write protected.
  • Remove write protection or use another disk.
  • Media is write protected.

One more thing is to note is that Write Protection on any portable USB Drive can be applied by the physical lock provided on the card adjuster or sometimes provided on the pendrive, so make sure that your pendrive is not write protected by the physical lock.
But even after moving the physical lock for write protection, the problem continues, then follow the procedure below to remove the write protection:

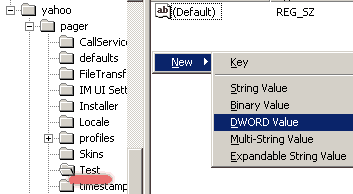
1. Open Start Menu >> Run type regedit and press Enter. This will open Registry Editor.

2. Navigate the following path:

        HKEY_LOCAL_MACHINE\SYSTEM\CurrentControlSet\Control\StorageDevicePolicies

Note:  If the registry key StorageDevicePolicies does not exist, you will need to create it.

3. Double click the key WriteProtect in the right panel and set the value to 0 in the Value Data Box and press OK button.

4. Exit Registry Editor and restart you system. and check for the problem again.

Now its done...:) 
Use this and share you thoughts here... if you have any other way to solve this problem or for some other problem you can share with us.
Your suggestions are always welcome....:)

Links:
1. SpeedUp Folder Browsing
2. Start computer in 10 sec

Multiple Login in Yahoo Messenger

Hi friends... This is my first post on HariGeek.com and i hope you all will like it. This is first time I am writing article on any site so I am expecting your feedback, It will help me to enhance my writing skills. So this comes my first post on "Multiple Sign In in Yahoo Messenger".

If you have multiple Yahoo ID's and wants to Login with more than one ID at the same time then don't worry, you can login with more than one yahoo ID at the same time. There is no need to install any other yahoo multi messenger version, you can easily convert your normal yahoo messenger to multi messenger and enjoy your all ID's at the same time.
Follow the following steps to convert your Yahoo messenger to MultiMessenger Version:

1. Click on Start button and then go to Run, type regedit in Run option and press enter.

2. In Registry Editor locate the location to HKEY_CURRENT_USER/Software/Yahoo/Pager/Test


3. Here in right side panel, Right Click to create a new Dword
with name Plural and give it value 1

4. Now close the registry editor and restart your computer after any changes to go into effect.

5. For SignIn open more then one yahoo messenger, open as you want and sign in through you different ID's

6. If you want to disable the multi-messenger option then again open Registry Editor and change Plural
value 1 to 0

So friends try it and share you experience with us. Your feedback is very important for us....:)

Rename Recycle Bin (Window xp)

This is most basic question which people usually used to ask others.. "How to rename recycle bin?". 
Today i will tell you how you can rename  recycle bin in windows xp. Just follow the follwoing steps and you can rename recycle bin:


1. Click on Start button and then click on Run.
2. Type Regedit in run box and click on OK button. It will open the Registry Editor.
3. Then follow the following path.
    HKEY_CLASSES_ROOT \ CLSID \ {645FF040-5081-101B-00AA002F954E} \ ShellFolder
     you will find two registry entries :  Attributes  and CallForAttributes
4. Change their values by double click on it by following values:
      "Attributes"    =   50 01 00 20
      "CallForAttributes"  =  00  (Hexadecimal)
5. Now Refresh your desktop and right click on recycle bin. Now you can see Rename option on the menu.


Please Note for the recycle bin:
By default "CallForAttributes" should be 60
 This method will work only for fewer versions for windows xp sp2  2600 built.


Warning:
Incorrectly editing the registry may severely damage your system.
Thanks,
Harish

Rename Recycle Bin (Window xp)

This is most basic question which people usually used to ask others.. "How to rename recycle bin?".
Now you can Rename RecycleBin by just typing few codes in you notepad. So type the code below and enjoy..


To rename your recycle bin jst copy the following code or type it in notepad and
 save it as *.reg  (.reg is a extionsion of the registry script file) and run it:

REGEDIT4
[HKEY_CLASSES_ROOT\CLSID\{645FF040-5081-101B-9F08-00AA002F954E}\ShellFolder]
"Attributes"=hex:50,01,00,20


"CallForAttributes"=dword:00000000


To remove changes from registry and to restore default registry setting, type following code in node and save it as *.reg run it.:


 REGEDIT4
[HKEY_CLASSES_ROOT\CLSID\{645FF040-5081-101B-9F08-00AA002F954E}\ShellFolder]
"Attributes"=hex:50,01,00,20


"CallForAttributes"=dword:00000060

Note:
 This method will work only for fewer versions for windows xp sp2  2600 built.


Warning:
Incorrectly editing the registry may severely damage your system.
Thanks,
Harish

 
Designed and Maintained by